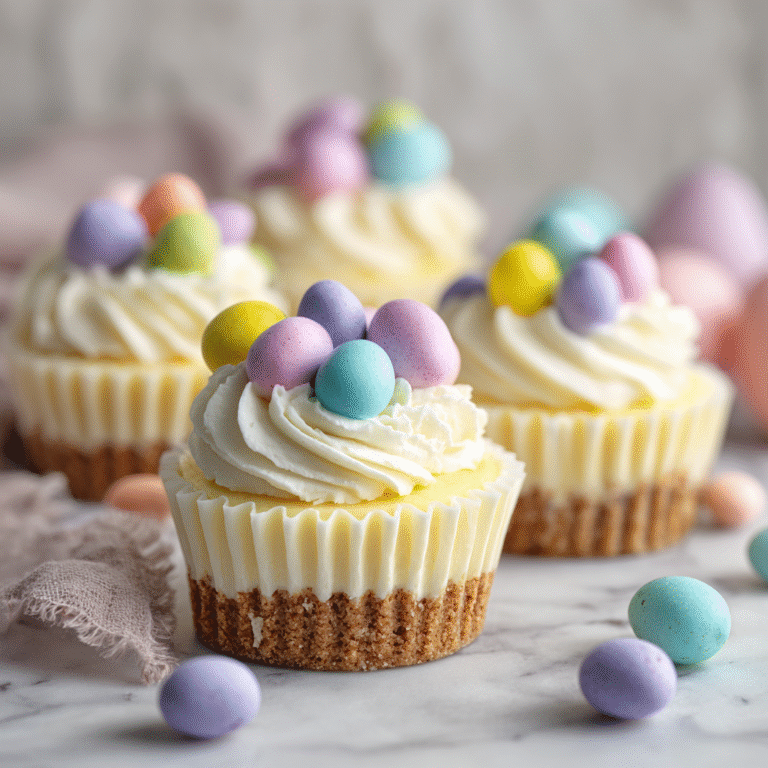
Easter No-Bake Mini Cheesecakes are the kind of dessert that makes a spring table feel instantly festive without turning your kitchen into a stress zone. They’re creamy, bright, and perfectly portioned, with that dreamy cheesecake tang and a buttery cookie crust that tastes like pure comfort.
Because they’re no-bake, you skip the water bath, oven juggling, and cracking worries. Instead, you get smooth, cloudlike filling that sets in the fridge while you do literally anything else. That’s a win during a holiday weekend when the oven is usually busy.
These mini cheesecakes also shine on presentation. Pastel toppings, mini eggs, whipped cream swirls, lemon zest, berries, or tiny chocolate bunnies make them look like you ordered them from a bakery. But the base recipe stays wonderfully simple, and you can customize each one so every guest feels like you made theirs “special.”

Why This Recipe Works Every Time
These are engineered for low effort and high reward, with a texture that turns out reliably creamy.
- No oven required: perfect for busy holidays and warm spring days.
- Perfect portions: individual minis serve cleanly and look polished.
- Stable, sliceable texture: the filling sets firm without turning gummy.
- Budget-friendly: cream cheese + whipped topping ingredients go far.
- Beginner-friendly: no baking science, no cracks, no guesswork.
- Make-ahead dream: they’re better after chilling overnight.
- Endlessly customizable: crust and toppings can match any Easter theme.
What You’ll Need
Core Ingredients
These are the essentials for classic Easter No-Bake Mini Cheesecakes.
- Cream cheese (full-fat for the best set and flavor)
- Powdered sugar (sweetens while staying silky smooth)
- Heavy whipping cream (whipped for structure and fluff)
- Vanilla extract (or vanilla bean paste for a bakery vibe)
- Lemon juice (a little brightness balances the richness)
- Graham crackers (or vanilla wafers / shortbread cookies for the crust)
- Butter (melted, to bind the crust)
- Pinch of salt (makes everything taste more “cheesecake-y”)
Flavor Boosters (Spices, Aromatics, Sauces)
These aren’t required, but they make the flavor pop and feel springy.
- Lemon zest (fresh, fragrant, super Easter-friendly)
- Almond extract (tiny amount adds a bakery note)
- White chocolate (melted into the filling for extra richness)
- Berry jam (swirled or layered for color)
- Pastel sprinkles (for instant celebration)
- Fruit curds (lemon curd is especially perfect)
- Cinnamon (if using graham crust and you want warmth)
Smart Swaps & Add-Ins
Substitutions:
- Digestive biscuits or Biscoff instead of graham crackers
- Greek yogurt (a few tablespoons) for extra tang, but don’t replace everything
- Coconut cream instead of heavy cream (chilled and whipped) for a dairy-free direction
- Dairy-free cream cheese for an allergy-friendly batch (set may be slightly softer)
Add-ins:
- Mini chocolate eggs (classic Easter look)
- Crushed candy (like pastel M&Ms)
- Fresh berries (strawberries, raspberries, blueberries)
- Shaved chocolate or white chocolate curls
- Edible flowers (beautiful, springy, minimal effort)
Step-by-Step: From Prep to Plate
You’ll be working with three simple elements: crust, filling, and toppings. The chill time does the heavy lifting.
- Line a muffin pan.
Place paper liners in a 12-cup muffin tin (or use silicone liners for the cleanest release).
Technique note: Silicone liners give the sharpest “mini cheesecake” edges. - Crush the cookies.
Pulse graham crackers (or cookies) into fine crumbs.
Technique note: Fine crumbs pack better and slice cleaner. - Mix the crust.
Stir crumbs with melted butter, a pinch of salt, and a spoonful of sugar if you like a sweeter base. The texture should resemble damp sand. - Press the crust firmly.
Add about 1 to 1 1/2 tablespoons crust mixture into each liner and press down hard using a spoon or the bottom of a small glass.
Technique note: Firm pressure is what prevents crumbly crust. - Chill the crust.
Pop the pan into the fridge (or freezer for 10 minutes) while you make the filling.
Technique note: Cold crust = cleaner layers later. - Beat the cream cheese.
In a mixing bowl, beat softened cream cheese until completely smooth.
Technique note: Scrape the bowl often to avoid lumps. - Add sweetness and flavor.
Beat in powdered sugar, vanilla, lemon juice, and lemon zest if using.
Technique note: Powdered sugar dissolves instantly, keeping the filling velvety. - Whip the cream separately.
In a clean bowl, whip cold heavy cream to stiff peaks.
Technique note: Stiff peaks are key for structure in no-bake cheesecakes. - Fold to keep it fluffy.
Gently fold the whipped cream into the cream cheese mixture in 2–3 additions.
Technique note: Use a spatula and fold, don’t stir aggressively. - Fill the cups.
Spoon or pipe the filling over each crust. Smooth the tops or create swirls with a piping tip.
Technique note: A piping bag makes them look bakery-made fast. - Chill until set.
Refrigerate at least 6 hours, ideally overnight.
Technique note: Overnight chill gives the cleanest bite and best flavor. - Decorate for Easter.
Add whipped cream, mini eggs, sprinkles, berries, lemon curd, or chocolate bunnies right before serving.
Quick Visual Cues (Doneness Clues, Texture, Color, Aroma)
- Filling should look smooth and thick, not runny.
- After chilling, the tops should feel firm to a light touch.
- The center should hold shape when lifted, with a creamy, mousse-like bite.
- You’ll smell vanilla and lemon as soon as you peel the liner back.
Pro Tips From a “Made-This-Too-Many-Times” Cook
- Use room-temperature cream cheese for zero lumps.
- Whip the cream cold (chilled bowl helps if your kitchen is warm).
- Don’t overmix after folding or you’ll lose fluff and structure.
- Press crust hard so it doesn’t crumble when unwrapped.
- Pipe for pretty: even a simple star tip makes minis look professional.
- Decorate last minute so sprinkles stay crisp and candies don’t bleed color.
- Taste before filling: adjust lemon and vanilla to your preference.
- Make a mixed batch: divide filling and tint pastel shades for a party tray.
Serving Ideas That Make It Feel New
These minis are already party-ready, but you can style them to match your Easter vibe.
- Classic Easter candy tray: top each with whipped cream and 2–3 mini eggs.
- Spring berry garden: add fresh berries and a tiny mint leaf.
- Lemon-lovers version: swirl lemon curd on top and add lemon zest.
- Chocolate bunny theme: mini chocolate bunny + chocolate shavings.
- Brunch dessert: serve with coffee, fruit salad, and a light dusting of powdered sugar.
- Kids’ decorating bar: set out toppings and let everyone decorate their own.
Easy topping combos:
- whipped cream + mini eggs + pastel sprinkles
- lemon curd + blueberries + zest
- strawberry jam swirl + crushed vanilla wafers
- white chocolate curls + raspberries
- chocolate ganache drizzle + chopped nuts
Variations You’ll Actually Want to Try

Here are flavorful, realistic twists that still keep the no-bake mini cheesecake spirit.
- Healthier version
Use reduced-fat cream cheese and replace part of the heavy cream with thick Greek yogurt. Sweeten lightly and top with fresh fruit. - High-protein version
Fold in a few spoonfuls of vanilla Greek yogurt and add a scoop of unflavored or vanilla protein powder (start small so texture stays smooth). Top with berries and nuts. - Vegan version
Use dairy-free cream cheese and whip chilled coconut cream. Sweeten with powdered sugar and add lemon. Set may be slightly softer, but still delicious. - Spicy version (yes, really)
Add a pinch of cayenne to a chocolate cookie crust, top with dark chocolate drizzle. The heat is subtle and surprisingly grown-up. - Kid-friendly pastel funfetti
Fold pastel sprinkles into the filling (use jimmies to reduce bleeding) and top with candy eggs. - Carrot cake vibe
Use crushed ginger cookies for the crust and top with a tiny swirl of cream cheese frosting and shredded carrot garnish. - Berry swirl minis
Swirl raspberry or strawberry jam into the filling for a marbled look.
Storage, Reheating, and Make-Ahead Game Plan
Refrigeration:
- Store in an airtight container for 3–4 days.
- Keep toppings (especially whipped cream swirls and candy) separate if possible.
Freezing:
- Freeze the minis (without delicate toppings) for up to 1 month.
- Wrap each cheesecake individually and store in a freezer-safe container.
Thawing:
- Thaw in the fridge overnight for best texture.
- Avoid thawing at room temperature for long periods; they soften quickly.
Make-ahead:
- Make them 1–2 days before Easter for stress-free hosting.
- Add toppings the day of serving for the prettiest look.
Texture-preserving tips:
- If using fruit, pat berries dry so they don’t leak onto the top.
- If using sprinkles, add them right before serving to keep color crisp.
Troubleshooting: Common Mistakes and Easy Fixes
- Lumpy filling
Cream cheese wasn’t soft enough. Beat longer and scrape the bowl. Next time, let it sit at room temp 45–60 minutes. - Filling won’t set
Cream wasn’t whipped to stiff peaks or you overfolded. Chill overnight; if still soft, freeze for 30–45 minutes before serving. - Crust crumbles
Not enough butter or not pressed firmly. Add a teaspoon more butter next time and pack it down hard. - Too sweet
Reduce powdered sugar slightly and add a touch more lemon juice and salt to balance. - Candy “bleeds” color
Some candy shells sweat in the fridge. Decorate right before serving or place candies on a small whipped cream dollop to create a barrier. - Watery tops after chilling
Fruit wasn’t dried or condensation formed. Keep container covered and avoid cutting airflow in/out too often. - Grainy texture
Overwhipped cream can get grainy. Whip to stiff peaks but stop once it holds shape cleanly.
Ingredient Deep Dive (Pick 3 Key Ingredients)
Cream Cheese
Why it matters:
- This is the main body and tang of your mini cheesecakes. It determines the overall richness and set.
How to choose it:
- Full-fat brick-style cream cheese gives the best texture.
- Avoid whipped cream cheese tubs; they can make the filling too soft.
Best substitute:
- Dairy-free cream cheese works well, but expect a slightly softer set and add extra chill time.
Heavy Whipping Cream
Why it matters:
- Whipped cream is what gives no-bake cheesecake its lightness and structure without gelatin.
How to choose it:
- Look for heavy cream with higher fat content for the most stable whip.
- Keep it very cold until whipping.
Best substitute:
- Chilled coconut cream (for a dairy-free option) or stabilized whipped topping in a pinch.
Cookie Crumbs (Graham Crackers or Wafers)
Why it matters:
- The crust adds buttery crunch and balances the creamy filling.
How to choose it:
- Grahams are classic, vanilla wafers feel more “spring dessert,” and Biscoff gives a caramel note.
- Crush them finely for a crust that slices clean.
Best substitute:
- Shortbread cookies, digestive biscuits, or chocolate sandwich cookies for a richer base.
FAQs
How long do Easter No-Bake Mini Cheesecakes need to chill?
At least 6 hours, but overnight is best for a firm set and the cleanest texture.
Can I make these without a muffin pan?
Yes. Use small jars, ramekins, or dessert cups. You’ll lose the “cupcake” shape, but they’ll still look beautiful.
What’s the best way to get perfect swirls on top?
Use a piping bag with a star tip and keep the filling chilled for 10 minutes if it feels too soft to hold shape.
Can I add food coloring for pastel Easter colors?
Yes. Gel food coloring works best because it won’t thin the filling. Tint small portions and pipe in layers for a marbled look.
Do these travel well?
They do, as long as they stay cold. Transport in a cooler bag with ice packs and add delicate decorations at the destination.
Final Thoughts
Easter No-Bake Mini Cheesecakes are the sweet spot between festive and effortless. You get a dessert that looks elegant, serves cleanly, and tastes like creamy, tangy cheesecake with a buttery crunch underneath, all without turning on the oven.
Make a batch, decorate them in pastel styles, and watch how fast they disappear. If you’re hosting, these are the kind of dessert that makes the whole table feel special while keeping you relaxed enough to actually enjoy Easter.
Print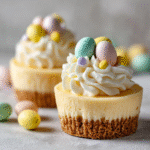
Easter No-Bake Mini Cheesecakes That Look Bakery-Pretty (But Are Secretly Easy)
- Total Time: 6 hours 25 minutes
- Yield: 12 mini cheesecakes 1x
- Diet: Vegetarian
Description
Easter No-Bake Mini Cheesecakes are creamy, fluffy individual desserts with a buttery graham cracker (or vanilla wafer) crust and a smooth, tangy cheesecake filling that sets in the refrigerator. Perfect for Easter brunch or spring parties, these mini no-bake cheesecakes are easy to make ahead, beautifully decorated with pastel sprinkles, mini chocolate eggs, berries, lemon curd, and whipped cream swirls for a bakery-style look with zero oven time.
Ingredients
- 16 oz (2 blocks) full-fat cream cheese, softened
- 3/4 cup powdered sugar
- 1 teaspoon vanilla extract (or vanilla bean paste)
- 1 tablespoon lemon juice
- 1 teaspoon lemon zest (optional)
- Pinch of salt
- 1 cup heavy whipping cream, cold
- 1 1/2 cups graham cracker crumbs (or vanilla wafer crumbs)
- 6 tablespoons unsalted butter, melted
- 1 tablespoon granulated sugar (optional, for crust)
- Toppings: whipped cream, pastel sprinkles, mini chocolate eggs, berries, lemon curd, chocolate shavings
Instructions
- 1. Line a 12-cup muffin pan with paper liners or silicone liners.
- 2. Mix graham crumbs, melted butter, pinch of salt, and optional sugar until it resembles damp sand.
- 3. Spoon 1–1 1/2 tablespoons crust mixture into each liner and press firmly with a spoon or small glass.
- 4. Chill crusts in the fridge while preparing filling (or freeze 10 minutes).
- 5. Beat softened cream cheese until completely smooth, scraping the bowl often.
- 6. Beat in powdered sugar, vanilla, lemon juice, lemon zest (if using), and salt until silky.
- 7. In a separate bowl, whip cold heavy cream to stiff peaks.
- 8. Gently fold whipped cream into cream cheese mixture in 2–3 additions until fluffy.
- 9. Spoon or pipe filling into each cup over the crust. Smooth tops or pipe swirls.
- 10. Refrigerate at least 6 hours, preferably overnight, until set.
- 11. Decorate just before serving with whipped cream, mini eggs, sprinkles, berries, lemon curd, or chocolate.
Notes
- Use brick-style cream cheese (not tub/whipped) for the firmest set.
- Whip cream to stiff peaks for structure; stop once it holds clean peaks to avoid graininess.
- For pastel colors, use gel food coloring so the filling stays thick.
- Make-ahead: chill 1–2 days in advance; add toppings the day of serving.
- Storage: refrigerate 3–4 days; freeze (without delicate toppings) up to 1 month and thaw overnight in the fridge.
- If candy colors bleed, decorate right before serving.
- Prep Time: 25 minutes
- Cook Time: 0 minutes
- Category: Dessert
- Method: No-Bake
- Cuisine: American
Nutrition
- Serving Size: 1 mini cheesecake
- Calories: 320
- Sugar: 18g
- Sodium: 220mg
- Fat: 23g
- Saturated Fat: 14g
- Unsaturated Fat: 7g
- Trans Fat: 0g
- Carbohydrates: 24g
- Fiber: 1g
- Protein: 4g
- Cholesterol: 70mg
Keywords: Easter No-Bake Mini Cheesecakes, no-bake mini cheesecakes, Easter dessert, mini cheesecake cups, spring dessert, no bake cheesecake recipe